
When it comes to training AI image generators or LoRA (Low-Rank Adaptation), the quality of your dataset is the single most important factor determining your results. However, gathering high-quality images and manually cropping them one by one to ensure the subject isn't cut off is... well, a nightmare. It might be doable for 20 images, but for hundreds or thousands? It’s just not realistic.
To automate this "simple but precision-demanding" step, let’s look at how to build a dataset using the YOLOv26 object detection model! ♪
Why "Auto-Cropping" is Essential
 In AI training, you can't just throw raw images into a training script (like ai-toolkit) or a captioning tool and hope for the best.
While most training tools do have built-in auto-crop features, there are very specific reasons why you should use a detection model like YOLO to crop before you start training.
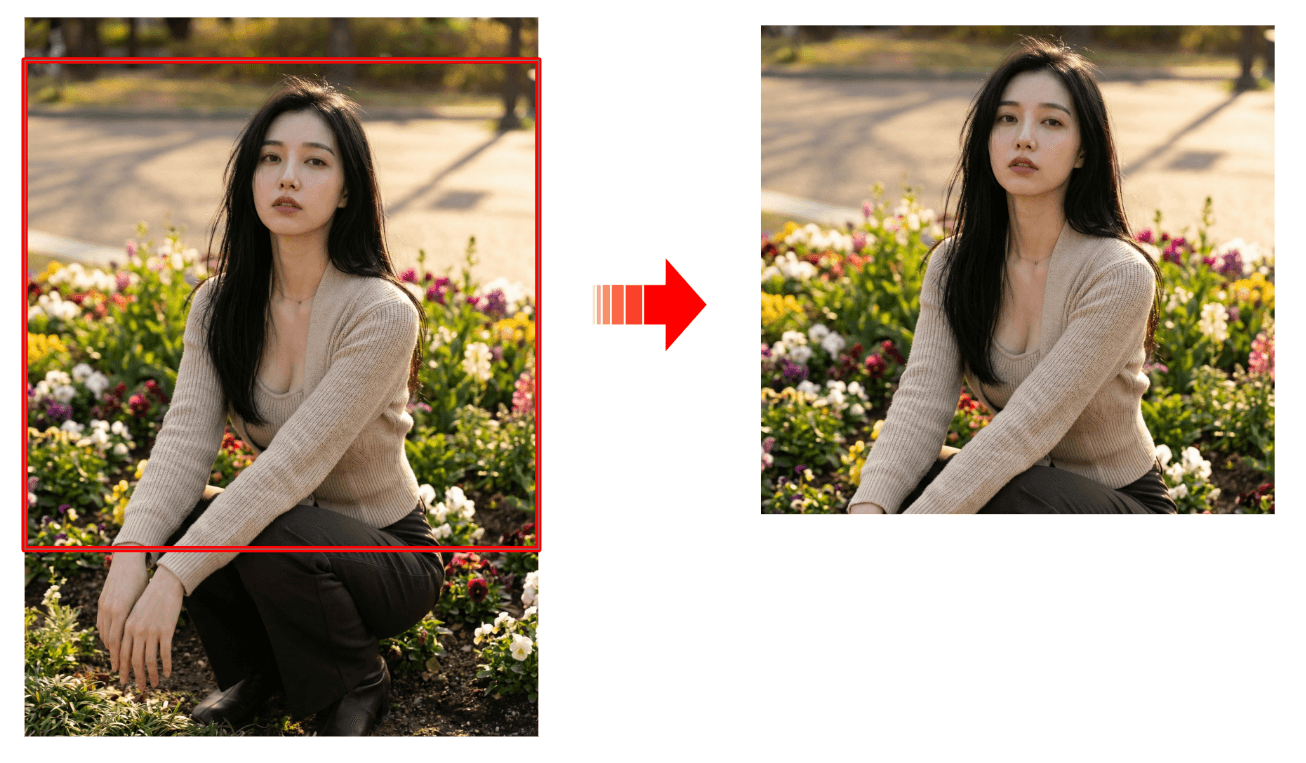
1. Preventing "Subject Cutoff"
Most built-in auto-croppers use either Center Crop (cutting the middle) or Random Crop .
If your subject is leaning toward the edge of the frame, these automated processes might end up with images where the subject is sliced in half or, worse, just a shot of the background. Since the AI learns these "broken" images as the correct "goal," your final model might produce unstable compositions or subjects that keep trying to escape the frame.
2. Optimization for Specific Aspect Ratios
AI models (like Stable Diffusion XL and newer) have specific aspect ratios where they learn most efficiently (such as a 1:1 square).
- Preventing Distortion: If you force-resize a wide or tall image into a square, your subject will look stretched or squashed.
- Maximizing Resolution: If you train with black bars (letterboxing), the pixels—and therefore the "information"—that should be describing your subject are wasted on the background, leading to a loss in fine detail.
3. Forcing "Subject Focus"
By using YOLO to pinpoint exact coordinates and cropping with appropriate padding (margins), you are essentially telling the AI: "Draw this." Physically removing background noise allows the LoRA training to converge faster and more accurately.
Introducing YOLOv26
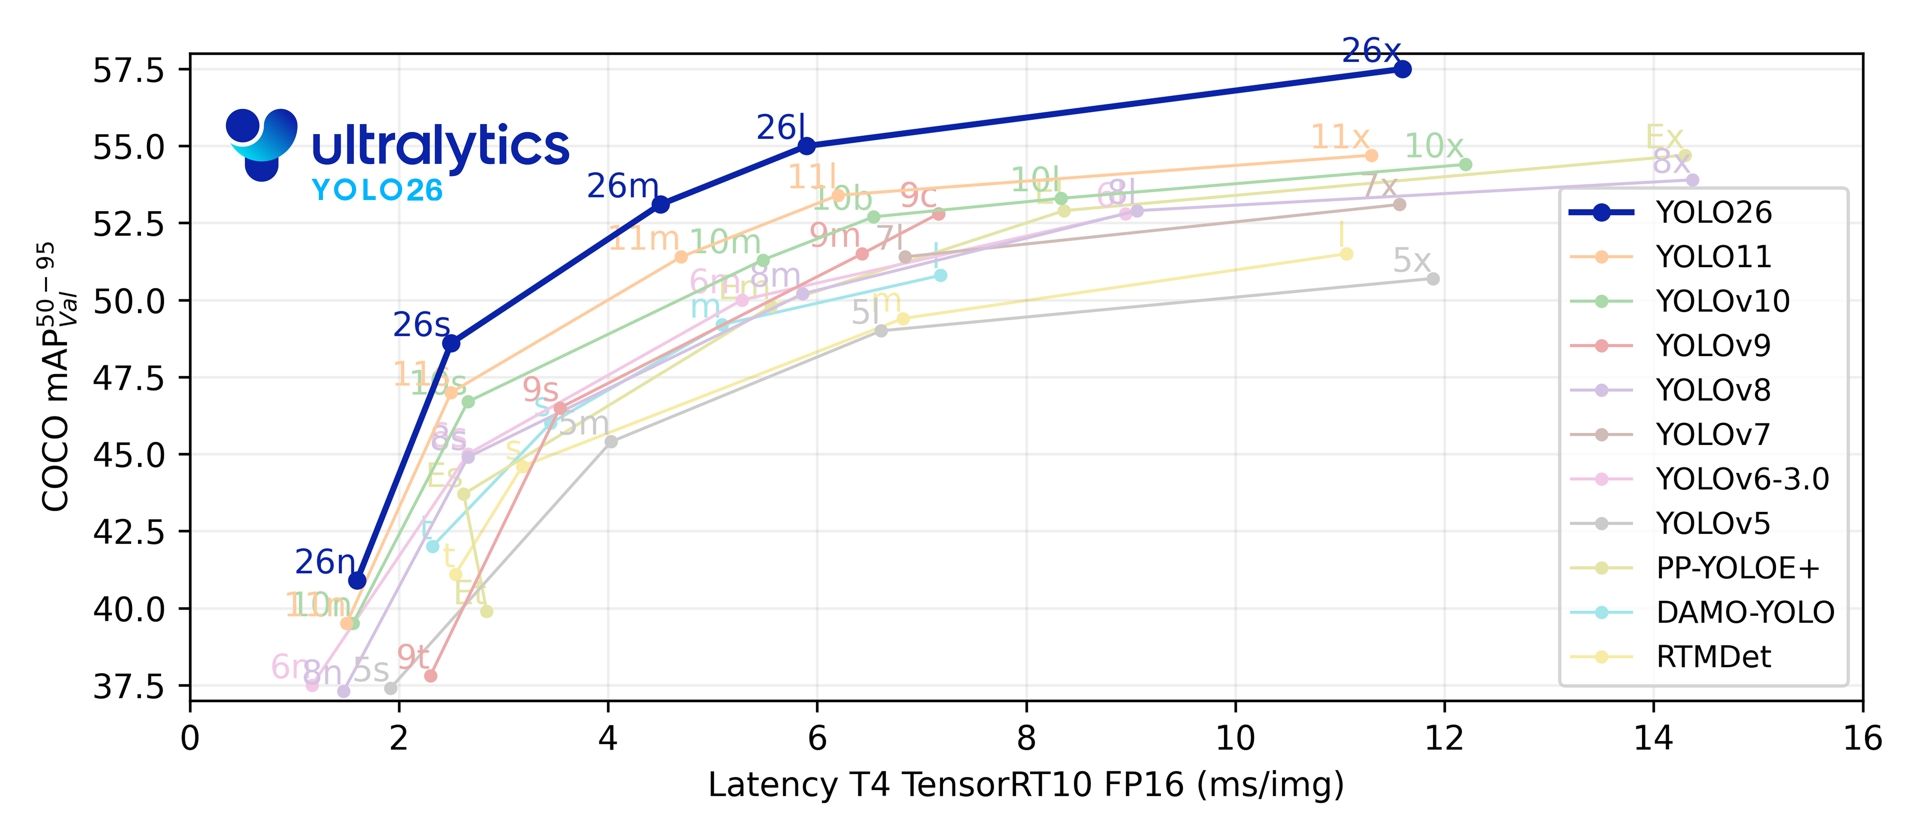
As of 2026, the latest model, YOLOv26, offers significantly improved efficiency on edge devices and better recognition for small objects compared to previous versions. The primary benefit of using this for dataset construction is its "highly accurate bounding box output."
1. High-Precision Detection via MuSGD Optimizer
YOLOv26 utilizes a new optimization algorithm called MuSGD (Hybrid of SGD and Muon), inspired by LLM training techniques. This makes fine-tuning for specific subjects much more stable, allowing it to accurately capture subjects in complex backgrounds that previous models might have missed.
2. Preventing "Clipping" with ProgLoss and STAL
The last thing you want is a training image where the subject is slightly cut off. YOLOv26 introduces ProgLoss (Progressive Loss balancing) and STAL (Scale-Targeted Attention Loss), which accurately identify the boundaries of small or overlapping objects. This minimizes issues like "clipping the tip of an ear" or "leaving out a foot" during the crop.
3. Massive Performance Boost for CPU-only Devices
With speeds up to 43% faster, processing large datasets is now a breeze even if you don't have a high-end GPU.
Implementing Auto-Crop with YOLOv26
 Let's break down how to use an object detection model like YOLOv26 to automatically crop images for your AI training dataset.
Put simply: we take the "object detection" data from YOLO and pass it into an "image processing" step to handle the crop.
Detailed Breakdown
You can implement auto-cropping by following these four steps ♪ I’ve included a link to a sample implementation below. Feel free to modify and use it however you like—it's also quite effective when used with specifically weighted models.
Requirements
- Python 3.10+
- A CUDA environment is recommended, but it runs perfectly fine on a CPU at reasonable speeds.
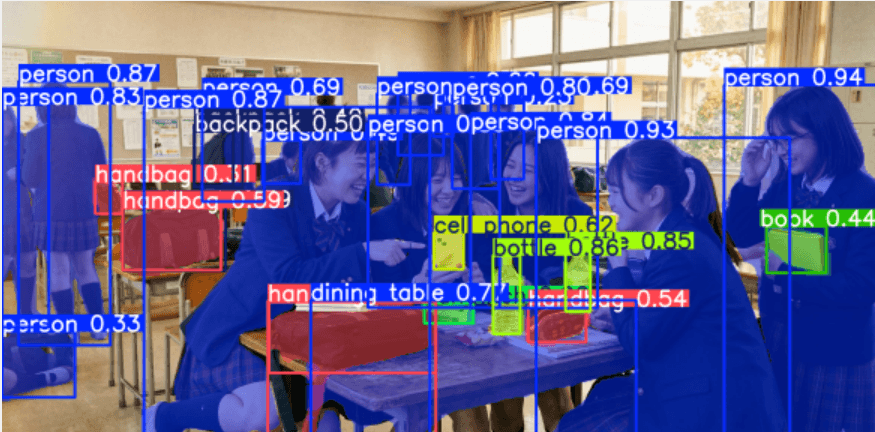
1. Object Detection
First, run the YOLO model on your input images to detect the training targets (e.g., faces, specific body parts, or characters).
2. Retrieve Bounding Box Info
The model outputs a "bounding box"—a rectangle surrounding the subject. This usually consists of four coordinates:
- (x_min , y_min): The top-left corner coordinates.
- (x_max, y_max): The bottom-right corner coordinates.
3. Calculate Crop Area
Based on the bounding box, calculate the square (or specific aspect ratio) area to be cropped.
- Find the Center: Calculate the center coordinates
(center_x, center_y).center_x = (x_min + x_max) / 2center_y = (y_min + y_max) / 2
- Determine Crop Size: Based on your target resolution (e.g., 1024x1024), decide the length of the sides for your square.
- Calculate Coordinates: Use the center point to find the boundaries.
crop_x_min = center_x - (crop_width / 2)crop_y_min = center_y - (crop_height / 2)
- Boundary Check: Ensure the calculated crop area doesn't fall outside the original image. If it does, include logic to "shift" the box back into the frame so that the subject stays intact, even if it's no longer perfectly centered.
4. Crop and Resize
Finally, use an image library (like OpenCV or Pillow) to crop the original image using those coordinates and resize it to your target dimensions.
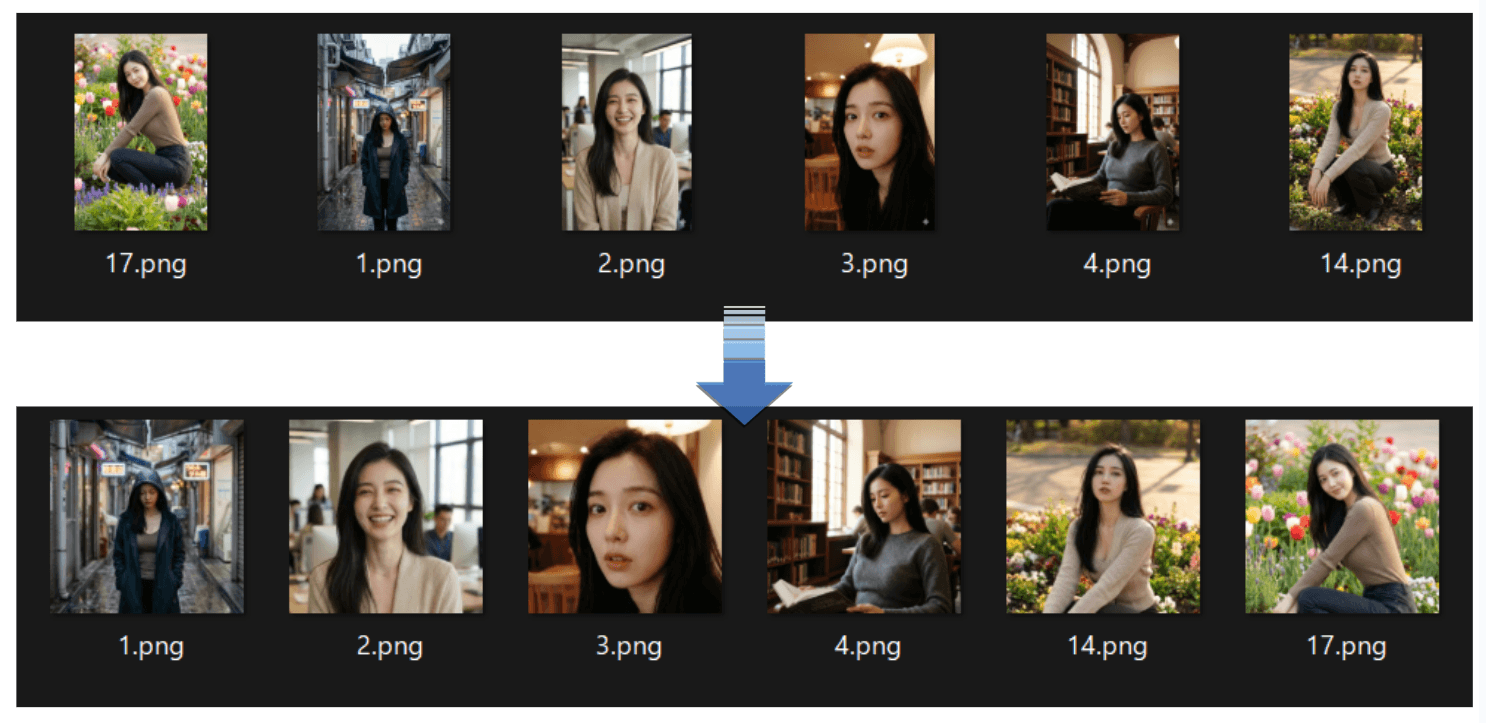
Usage Example
When you use the tool in the repository, it formats the images as shown below. Here, they are resized to 1:1 specifically for AI-Toolkit training.
Summary
Building a dataset is steady, time-consuming work. Since there are so many parts of the process that require a human touch, you should automate the boring parts whenever possible! ♡